Week 2: Linux System Administration & Automation

📌 Tasks
1️⃣ User & Group Management
User and group management is a core component of Linux system administration, ensuring secure access control and efficient permission management.
User Management :
User management is a key component of Linux system administration, covering user creation, modification, deletion, and permission control.
Creating Users:
sudo adduser devops_userDeleting Users:
sudo deluser devops_userModifying Users:
sudo usermod -l devops_user oldnameList all groups:
cat /etc/passwd
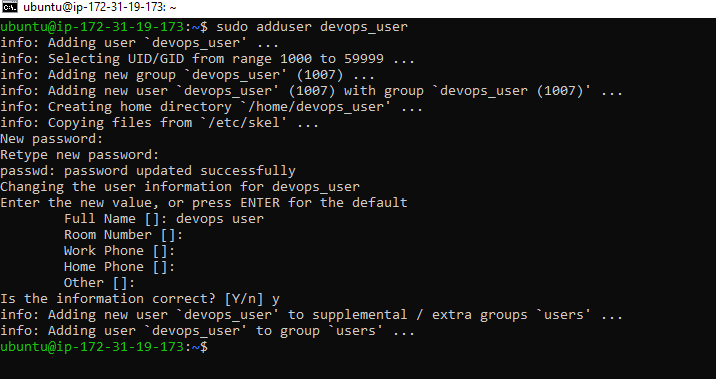
Group Management :
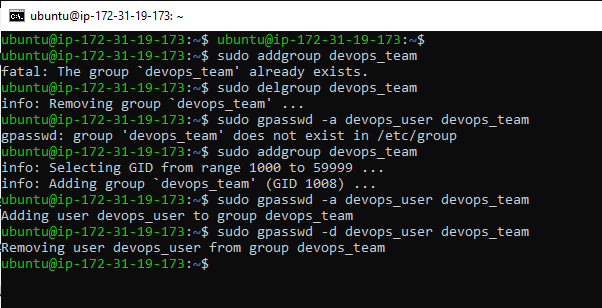
Group management in Linux refers to the process of creating, modifying, and managing groups of users. key role in organizing users and assigning permissions efficiently.
. Create a group: sudo groupadd devops_team
. Delete a group: sudo groupdel devops_team
. Add a user in a group : sudo gpasswd -a devops_user devops_team
. Remove a user from a group: sudo gpasswd -d devops_user devops_team
. List all groups: cat /etc/group
2️⃣ File & Directory Permissions :
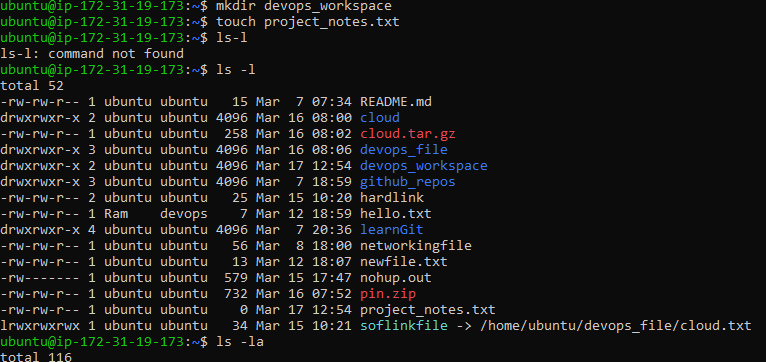
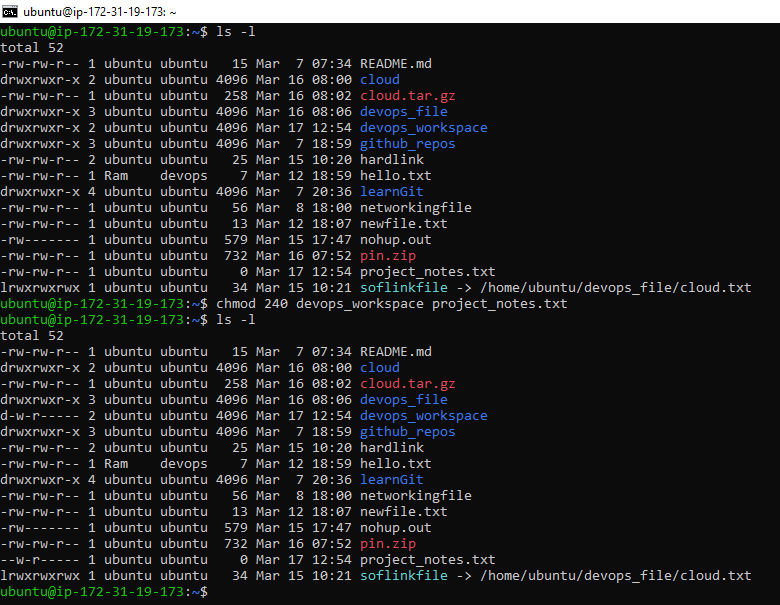
Linux permissions are divided into three categories Read (r),Write (w) and Execute (x) , Read allow for read only any file or directories, write allow for write, delete and rename any file or directories and Execute allow for run program/script. There is 3 labels of permission owner, group and other . Example - rwx r-x r—-
For example :
If we want owner can edit , group can read and other have no access :
Create
/devops_workspaceand a fileproject_notes.txt.
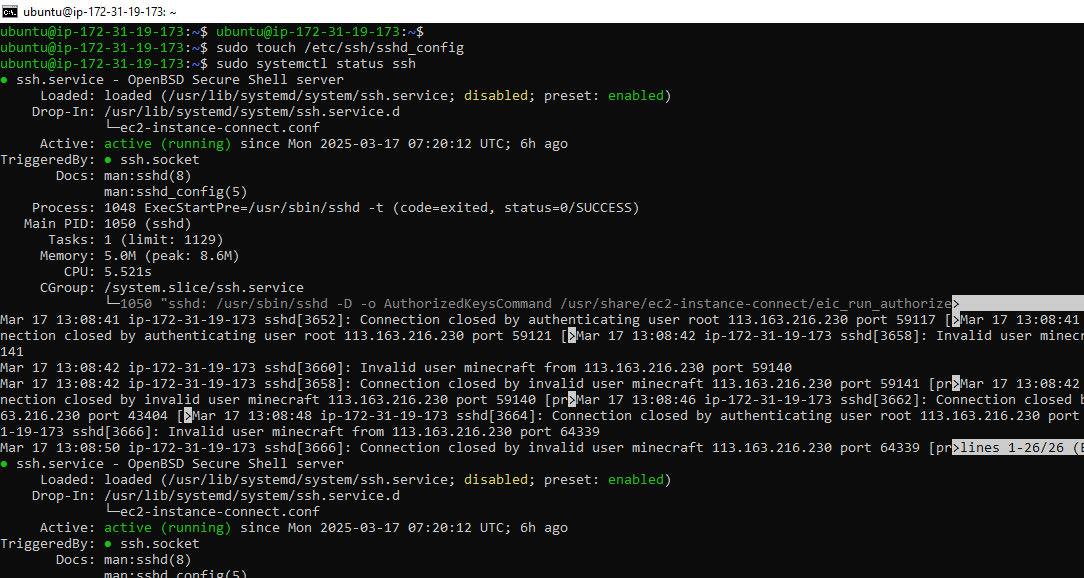
We can restrict SSH login for certain users by editing the /etc/ssh/sshd_config file using vim:
First need to install the openssh-server - Sudo apt-get install openssh-server
then need to create file /etc/ssh/sshd_config
3️⃣ Log File Analysis with AWK, Grep & Sed
Logs are crucial in DevOps! You’ll analyze logs using the Linux_2k.log file from Log Hub (GitHub Repo).
Task:
Extract insights using commands:
Use
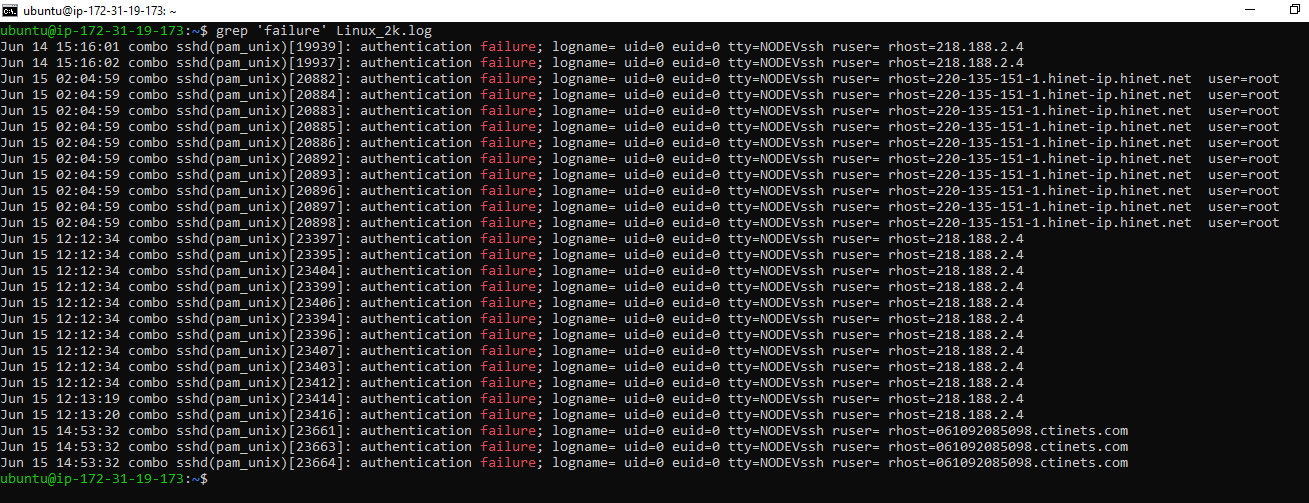
grepto find all occurrences of the word "failure".To find all occurrences of the word "failure" in a file using
grep, you can use the following command:
Use
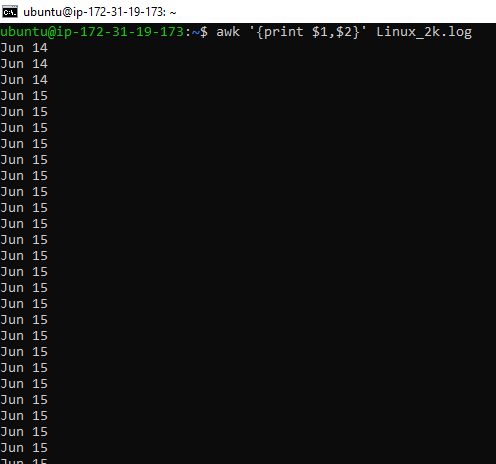
awkto extract timestamps and log levels.To extract timestamps and log levels from log files using
awk, you'll need a command that matches the specific format of your logs.
Use
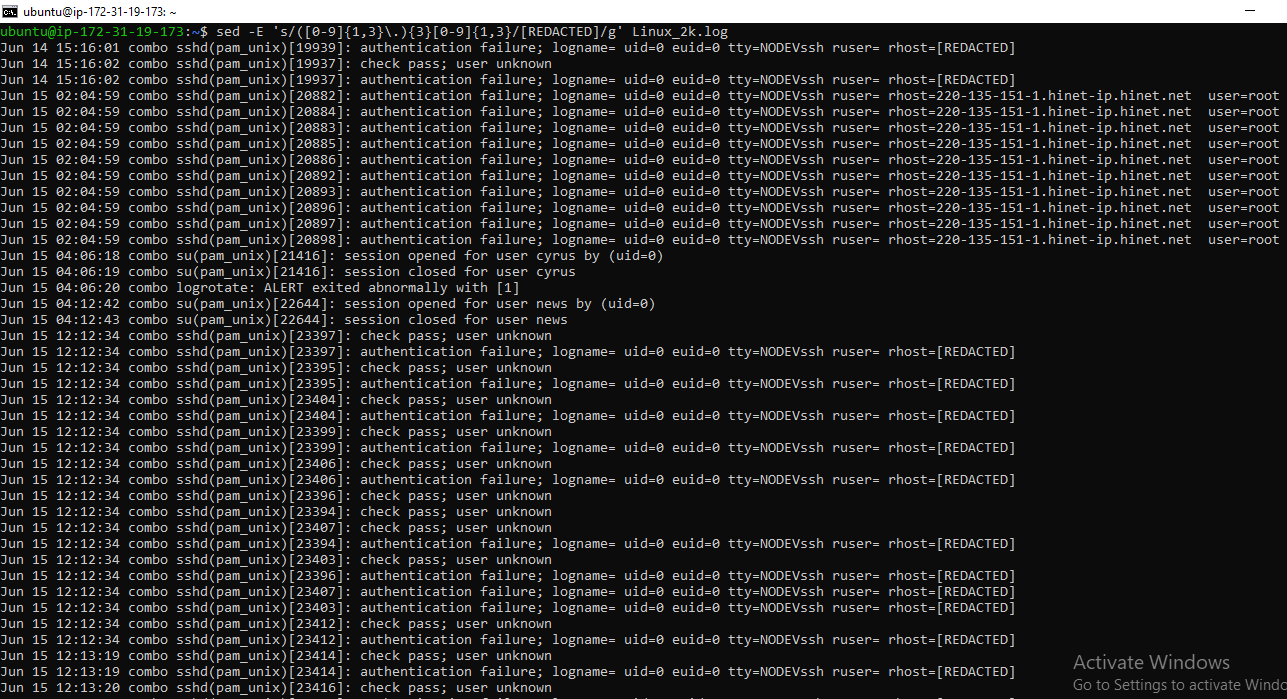
sedto replace all IP addresses with [REDACTED] for security.sed ‘s/([0-9]{1,3}\.){3}[0-9]{1,3}/g‘ Linux_2k.log
Here's a breakdown of the command:
-E: Enables extended regular expressions.s/([0-9]{1,3}\.){3}[0-9]{1,3}/[REDACTED]/g: The substitution pattern:([0-9]{1,3}\.){3}: Matches the first three octets of the IP address.[0-9]{1,3}: Matches the last octet of the IP address.The pattern is then replaced with
[REDACTED].
filename: The name of your file where you want to replace the IP addresses.
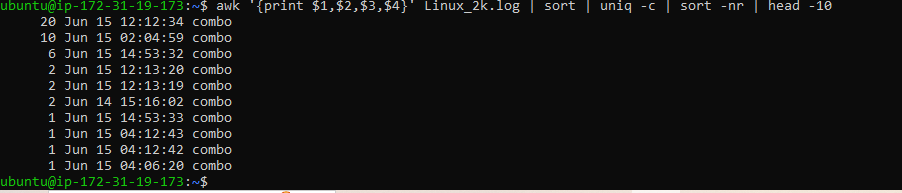
Bonus: Find the most frequent log entry using
awkorsort | uniq -c | sort -nr | head -10Here's a breakdown of the command:
awk '{print $0}' filename: This extracts the entire log entry from the file.sort: This sorts the log entries.uniq -c: This counts the unique occurrences of each log entry.sort -nr: This sorts the counts in descending order.head -10: This displays the top 10 most frequent log entries.
4️⃣ Volume Management & Disk Usage
Volume management is a crucial skill for any Linux enthusiast or DevOps professional.
1: Create a Directory for Mounting Start by creating a directory where the volume will be mounted. This directory acts as the access point for the volume's data.
sudo mkdir -p /mnt/devops_data
Step 2: Set Up a New Volume (or Loop Device) For local practice, you can use a loop device to simulate a new volume. Here's how to create and attach one:
sudo dd if=/dev/zero of=/tmp/devops_volume.img bs=1M count=100
Associate the file with a loop device:
bash
sudo losetup /dev/loop0 /tmp/devops_volume.imgFormat the loop device with a filesystem:
bash
sudo mkfs.ext4 /dev/loop0
Step 3: Mount the Volume Mount the newly created volume to the directory:
bash
sudo mount /dev/loop0 /mnt/devops_data
Step 4: Verify the Mount Check if the volume is mounted correctly using the following commands:
Display disk usage:
bash
df -hConfirm the mount point:
bash
mount | grep devops_data
Step 5: Unmount and Clean Up (Optional) When you're done, unmount the volume and detach the loop device:
bash
sudo umount /mnt/devops_data
sudo losetup -d /dev/loop0
5️⃣ Process Management & Monitoring
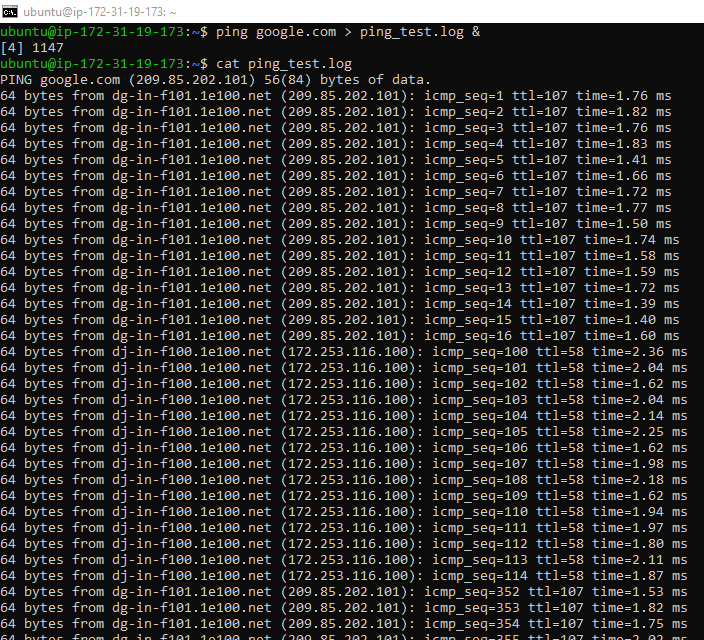
1. Starting a Background Process Run the following command to start a background process and log its output. ping google.com > ping_test.log &
Step 2: Monitor the Process :
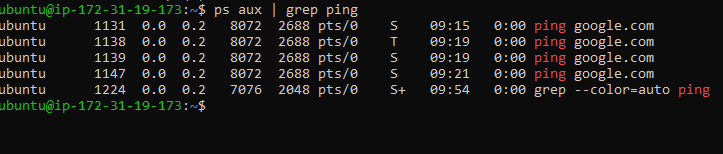
Using ps :
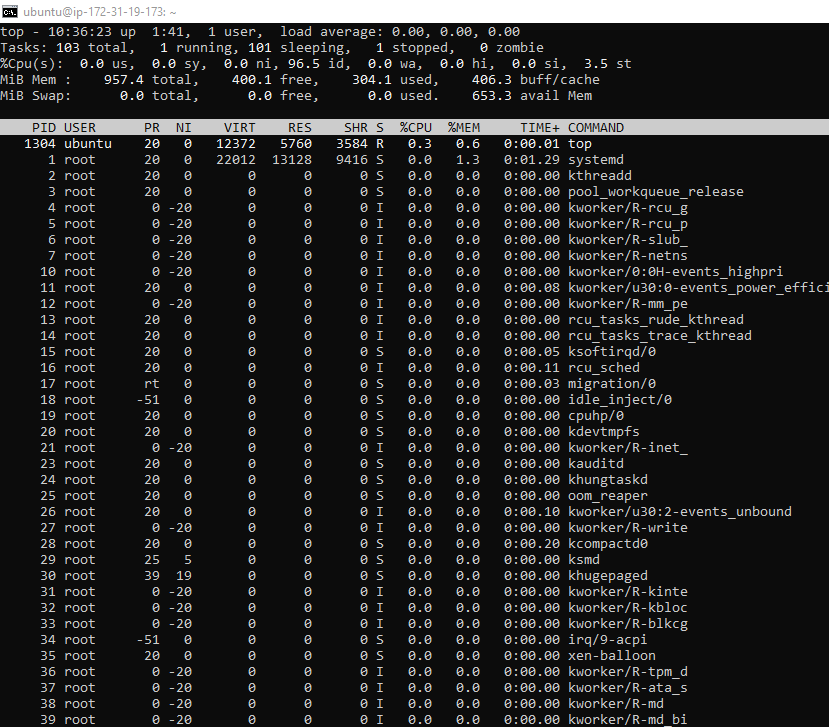
Using top:
Using htop:
If
htopis not installed, install it withsudo apt-get install htop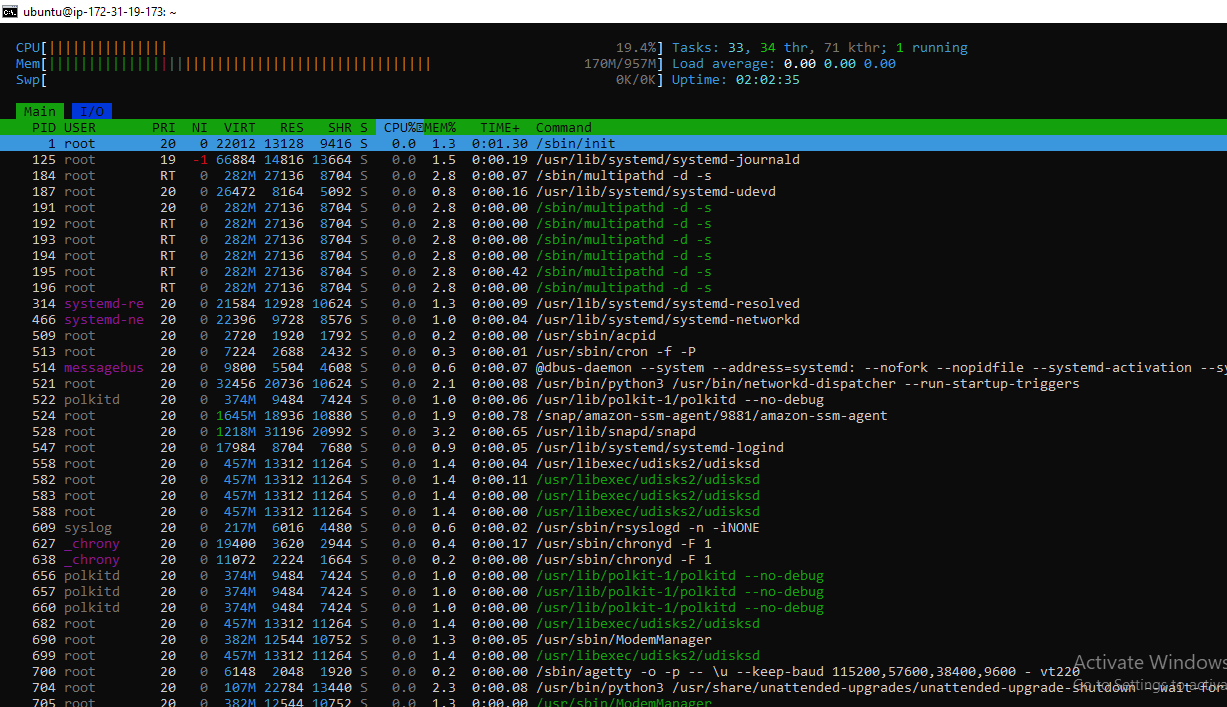
Step 3: Kill the Process
Kill -9 <PID>
6️⃣ Automate Backups with Shell Scripting
Task:
- Write a shell script to back up
/Devops_workspaceasbackup_$(date +%F).tar.gz.
- Write a shell script to back up
Step 1: Create the /Devops_workspace Directory
Open your terminal.
Run the following command to create the directory:
  mkdir -p /Devops_workspace
  mkdir -p /Backup
Step 2: Create the Shell Script
Open your favorite text editor and create a new file, e.g.,
BACKUP.shvim BACKUP.sh
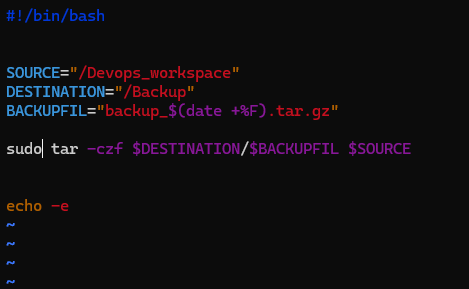
Step 3: Make the Script Executable
Run the following command to make the script executable:
chmod 764 BACKUP.sh
Step 4: Run the Script
Execute the script by running:
./BACKUP.sh
Step 5: Schedule the Script Using Cron
Open the crontab file for editing:
crontab -eAdd the following line to schedule the script to run daily at a specified time (e.g., at 2:00 AM):
0 2 * * * /path/to/BACKUP.shReplace
/path/to/BACKUP.shwith the actual path to theBACKUP.shscript.The first stands for every day, the second stands for every month, the third * stands for every weekday.
Save and close the crontab file.